If you’re eager to master the art of Heart Cake Decorating, specifically focusing on crafting the perfect heart-shaped cake, you’re in for a treat. This comprehensive guide is designed to help you navigate through the exciting process of baking and decorating your own heart-shaped masterpiece, just in time for that special occasion. Let’s roll up our sleeves and dive into the world of cake decorating together!
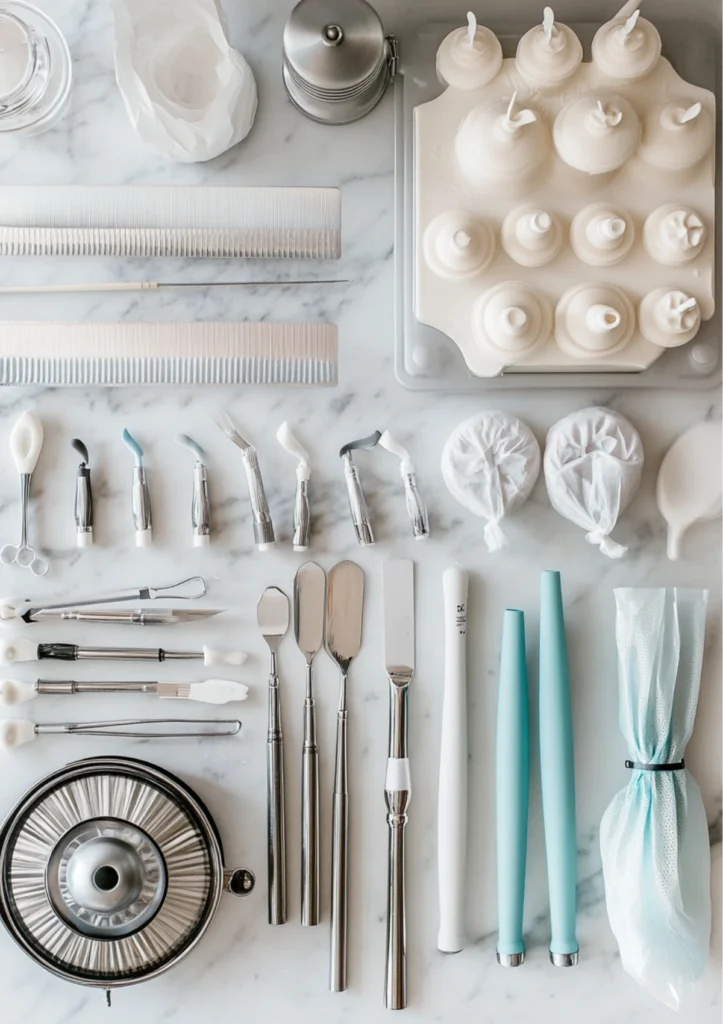
Selecting Your Baking Tools
Before you start, it’s essential to gear up with the right tools. Proper tools not only make the task easier but also enhance your decorating precision. Here’s what you should have on your kitchen counter:
- Essential Tools: Begin with a high-quality cake turntable, an offset spatula, and a variety of piping bags with tips. These are the basics that lay the foundation for professional-level decoration.
- Advanced Tools: As you grow more confident, incorporating an airbrush kit can elevate your designs, offering you a way to add gradient colors and intricate details with ease.
- Tool Care: Taking good care of your tools ensures they last longer and stay functional, keeping rust and damage at bay.
- Tool Substitutions: Don’t worry if you’re missing something specific. For instance, a sturdy bottle with a hole in the lid can double as a makeshift piping bag in a pinch.
Preparing the Cake Base
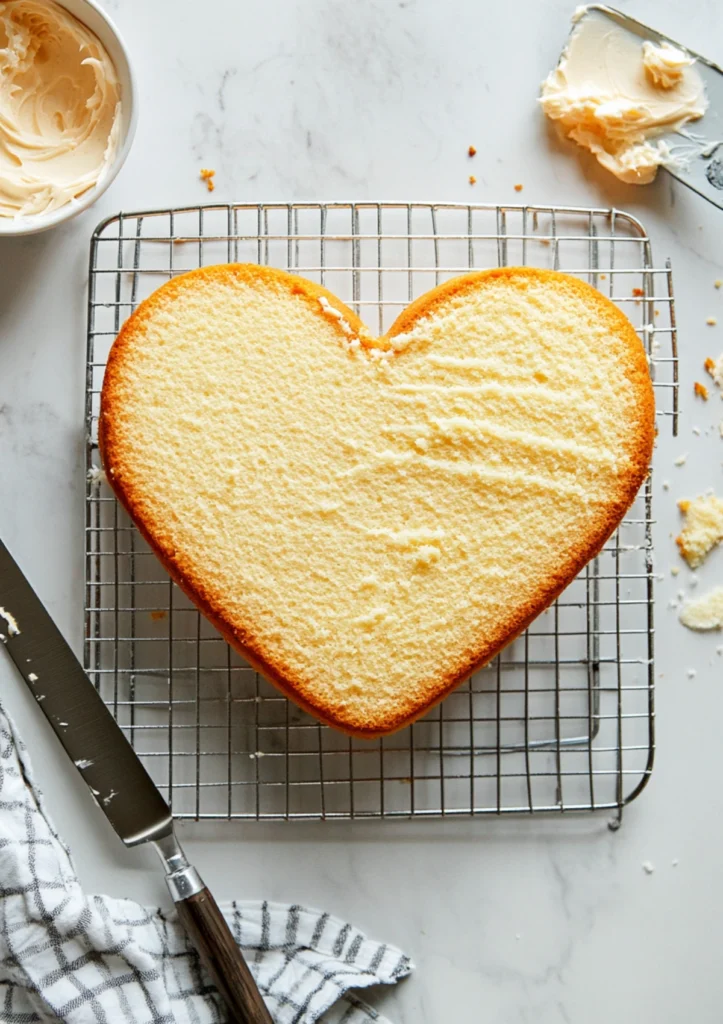
The base of your cake is the canvas for your artistic creations. Ensuring that this base is perfect is crucial:
- Choosing the Right Recipe: Opt for a dense but moist cake recipe that can support the weight of your decorations without sacrificing flavor.
- Baking the Cake: Follow the baking times meticulously to avoid a dry or undercooked base.
- Cooling and Leveling: Allow your cake to cool completely before leveling the top with a cake leveler or a serrated knife to create a smooth, even surface.
- Applying a Crumb Coat: This initial thin layer of frosting seals in the crumbs and prepares your cake for a flawless final frosting.
Mastering Frosting Techniques
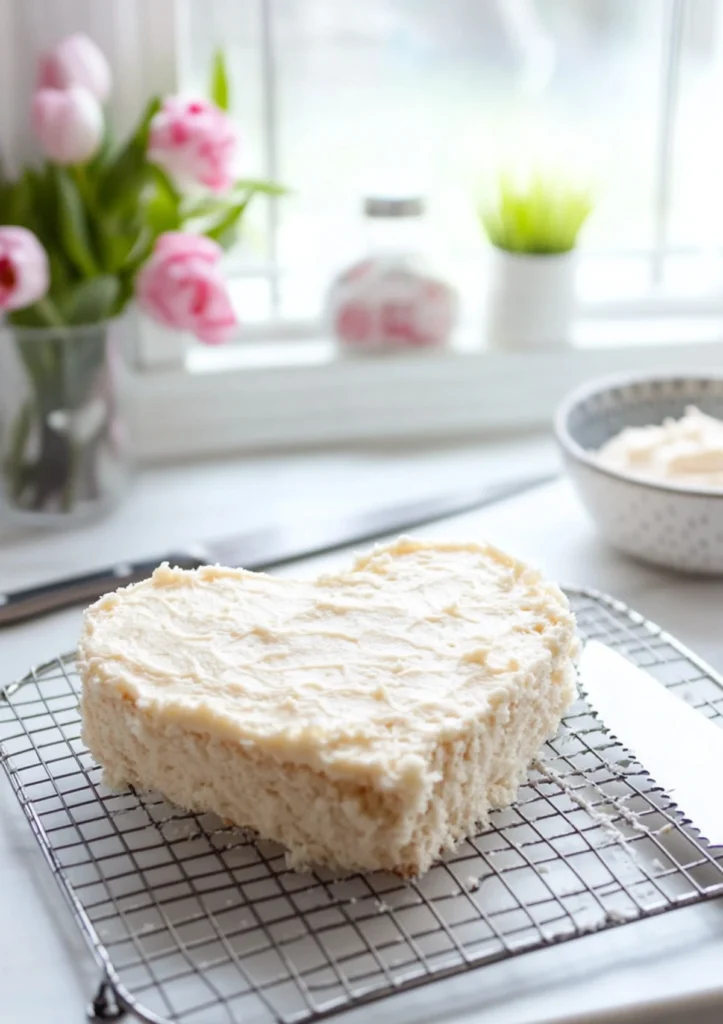
Frosting not only adds flavor but also provides a texture that can make or break your decoration efforts:
- Buttercream Options: Experiment with American, Swiss, or Italian buttercream to find the texture and sweetness you prefer.
- Color Mixing: Learn the art of color theory to mix frosting colors that won’t bleed or fade as they sit.
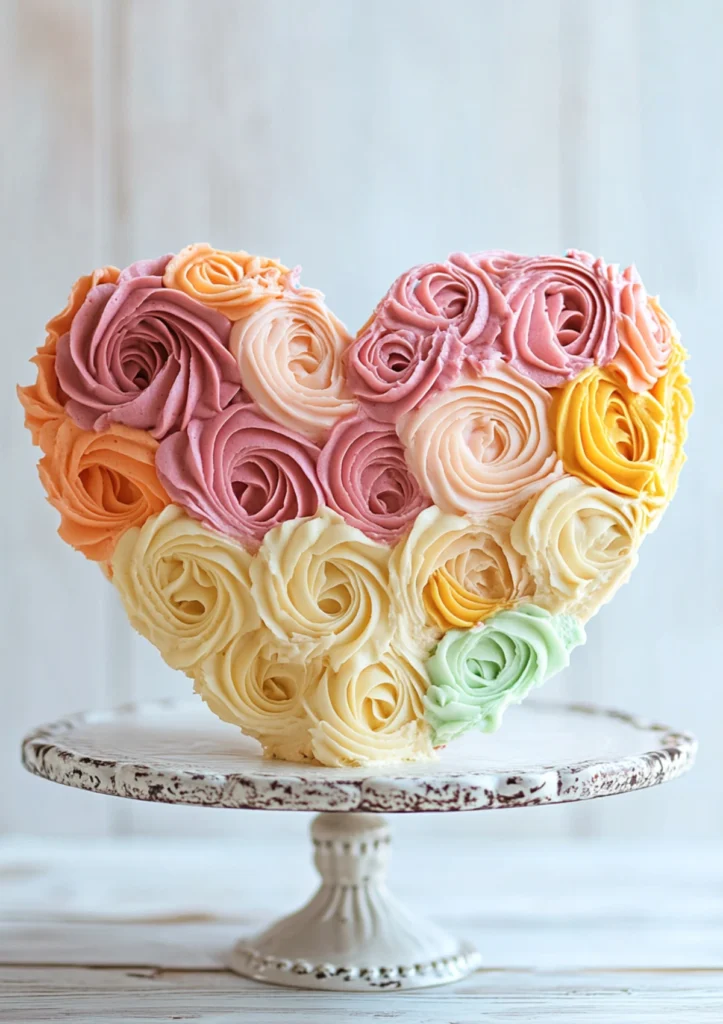
- Piping Skills: Practice various piping techniques using different tips to create stars, rosettes, and lace patterns.
- Fondant Usage: For a smooth, professional finish, consider using fondant to cover your cake, which can be rolled out and draped over the base.
Adding Decorative Flair
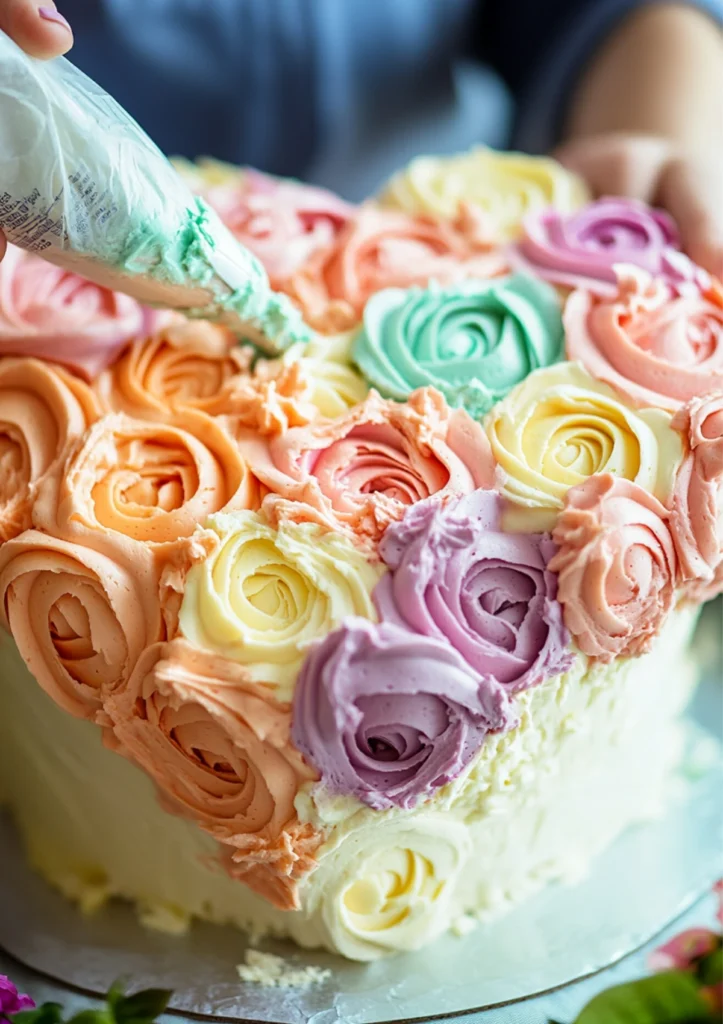
Now, let’s get creative with decorative elements that will make your cake a true showstopper:
- Using Edible Decorations: From edible gold leaf to candy beads, select quality decorations that complement the flavor of your cake.
- Creating Handmade Accents: Homemade fondant flowers or marzipan figures add a personal touch that pre-made decorations cannot match.
- Incorporating Themes: Whether it’s a Valentine’s Day, an anniversary, or a romantic dinner, adapt your decorations to suit the occasion.
- Non-edible Decorations: Sometimes, non-edible elements like ribbons or artificial flowers can add to the aesthetics, provided they are placed safely and removed before serving.
Final Presentation Tips
The final presentation is as important as the cake itself. Here’s how to ensure your cake is presented in the best possible way:
- Presentation Techniques: A beautiful cake stand can elevate your cake literally and figuratively, enhancing its appearance.
- Photography Tips: Good lighting and a simple background can help your cake photography stand out, perfect for sharing on social media.
- Serving Suggestions: Use a heated knife for clean cuts, and provide complementary sides like whipped cream or fruit compotes.
- Cleanup Tips: Keep your workspace clean and organized throughout the decorating process to avoid cross-contamination and to make the cleanup easier.
STORAGE AND FREEZING INSTRUCTIONS
To enjoy your cake for days (or even weeks) after, proper storage is key:
- Short-term Storage: Wrap your cake in plastic wrap or place it in an airtight container at room temperature for up to three days.
- Freezing Tips: For longer storage, freeze slices on a baking sheet before wrapping them individually for up to three months.
- Avoiding Common Mistakes: Keep your cake away from strong-smelling foods in the fridge to prevent flavor absorption.
- Food Safety: Always cool your cake completely before wrapping to prevent condensation and mold growth.
PRO TIPS FOR MAKING THE PERFECT HEART CAKE
Learn from the experts and avoid common pitfalls with these professional tips:
- Expert Baking Tips: Understand the importance of ingredient temperatures and mixing techniques to prevent a dense or tough cake.
- Decoration Perfection: Plan your design in advance and have all decorations prepared before you start.
- Time Management: Allocate ample time for each step, especially if you are trying new techniques.
- Ingredient Selection: Quality ingredients can significantly affect the taste and appearance of your cake, so choose wisely.
FREQUENTLY ASKED QUESTIONS (FAQ)
Let’s address some common queries to help you along your baking journey:
- Troubleshooting Common Issues: Learn how to fix bulging sides or a sinking middle.
- Substitution Queries: Understand how to substitute certain ingredients without compromising the quality.
- Enhancement Tips: Discover ways to enhance simple designs with minimal effort.
- Learning Resources: Recommend books, classes, and websites for further learning.
Conclusion
Congratulations on completing this journey through the delightful process of baking and decorating a heart-shaped cake! Remember, every cake is a canvas, and every baker is an artist. Don’t be afraid to experiment with designs and techniques. Most importantly, share your delicious creations and the love that went into making them. Ready to start baking? Share your experiences and creations, and let’s spread the joy of cake decorating together!
This guide ensures you are well-prepared to tackle your next baking project with confidence. With these tips and techniques, your next heart-shaped cake will not only taste delicious but look stunning too. Happy baking!